
Paying off Accounts
Select Cash to pay by cash or Pay to open the Pay screen to access other payment methods set up in Theme Modelling.
The process for paying off accounts varies according to whether you are using an ATS solution or an Ocius payment solution. Your manager or Zonal Account Representative will be able to tell you what solution is in place for your site.
Any payment method that has a button on the theme will appear in this screen, but only those card payment options that are enabled for use are displayed.
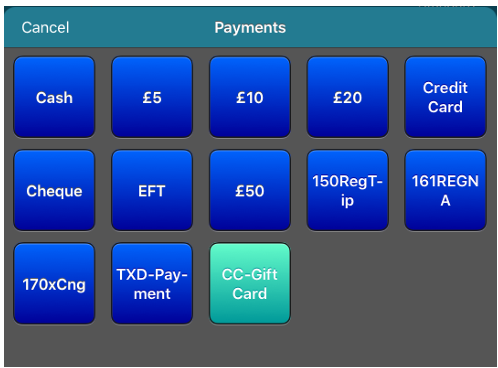
Cash payments can be enabled or disabled in the iServe Config Server. If disabled, the Cash option will be greyed out. The cash button will also be greyed out if the user’s default role does not have access to the cash payment button (does not apply to non-cash payments)
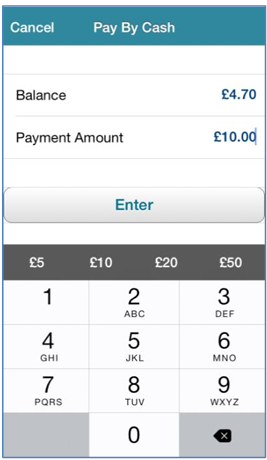
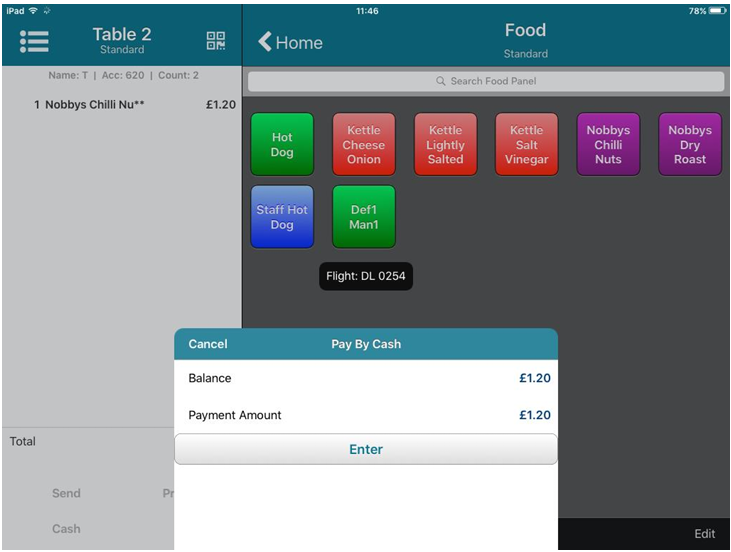
If you select cash, you will be prompted to enter the amount paid and press Enter.
If you select a quick pay option (£5/£10/£20 etc) the payment will be processed immediately without additional confirmation.
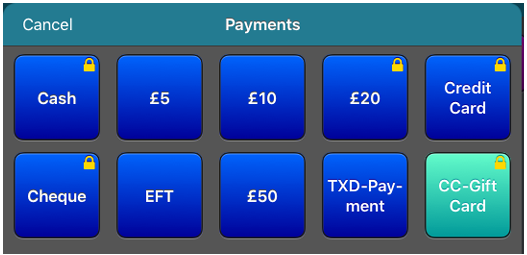
If access to payment buttons has been restricted by button security, a padlock will be displayed in the top right of the payment button. Button security is defined in Aztec Staff and Security at head office.
Button security is based on the user’s default role.
ATS Payments
Once the chosen payment method has been initiated in iServe, you cannot perform any other operation on iServe (apart from responding to any payment processing prompts).
Once initiated, all additional prompts and steps are handled by Aztec and the associated PED.
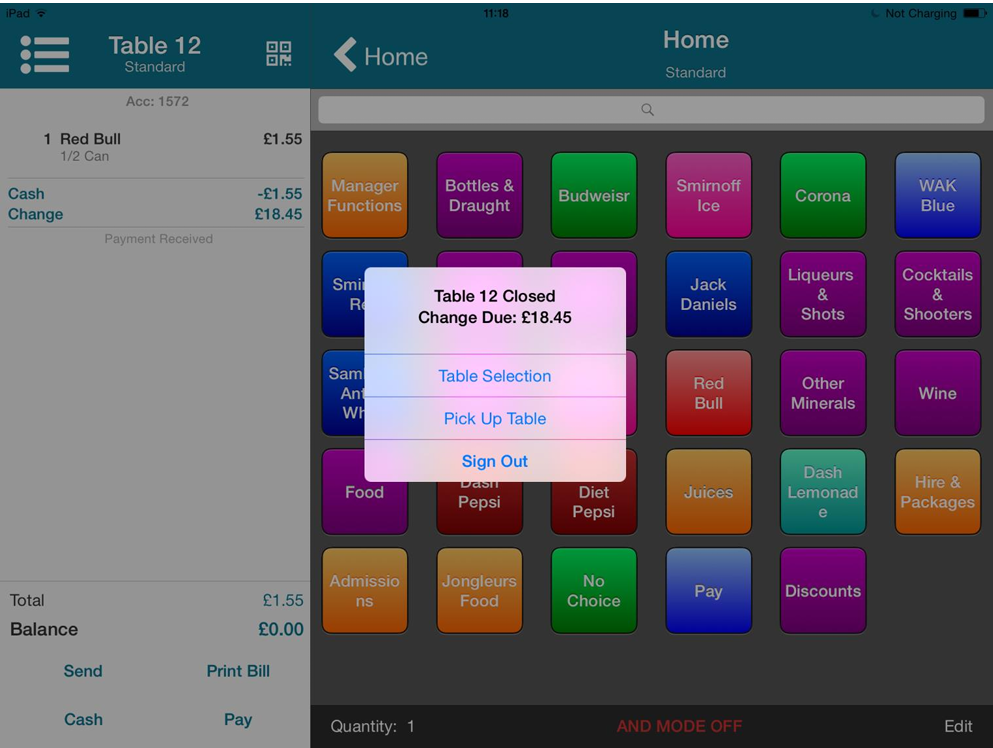
After a successful payment has been made, the Account x Closed message box is displayed listing any change due and prompts to create a new account and to pick up an existing account.
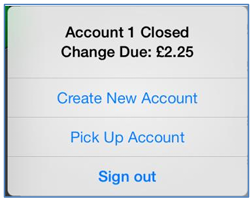
A Sign Out button is provided on this window so that if the user is not moving on to another transaction immediately the device can be left in a more secure state.
If table workflow mode is enabled, you will be prompted to select a new table or pick up an existing table:
Ocius Payments
Once the chosen payment method has been initiated in iServe, you cannot perform any other operation on iServe (apart from responding to any payment processing prompts).
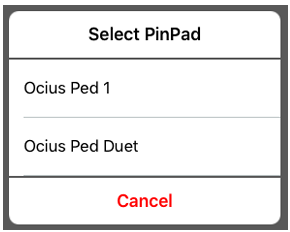
If more than one PIN pad is available, you will be prompted to select the required device:
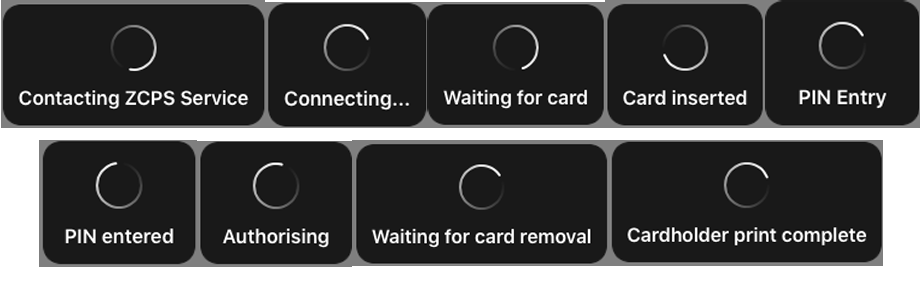
iServe will start to process the transaction and further prompts will be displayed on the PED.
The status of the transaction will be displayed on iServe, for example:
If after initiating a payment from iServe, no response is received, iServe will use the same timeout settings as the EPoS system to ensure that iServe devices can continue to be used even if a payment fails to respond.
If iServe goes offline after a card payment has been started, the following notification message is displayed:
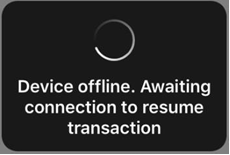
iServe will be unable to leave the account until the connection is restored and the payment is complete. After the connection is restored, iServe will sync the current basket and display the current status on-screen.
Flight Capture
If Flight Capture is enabled for your site, when you select a payment method you will be prompted to scan a barcode. In an airport environment this would be your boarding card, but you can also use this functionality wherever you want to capture information from a barcode. The title of this window can be defined in Aztec.
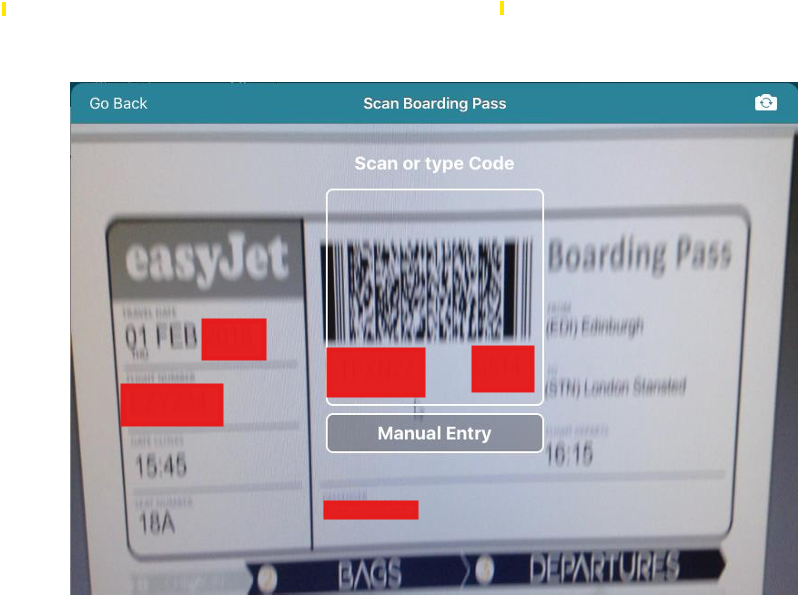
After iServe scans the barcode, a message is displayed briefly to indicate that the scanned details have been recorded.
You can then complete the payment process as normal.